Hello Guest

Home built drive shaft spacer

  • 7 Replies
  • 3503 Views

0 Members and 1 Guest are viewing this topic.

*

Offline MKOLSEN22

  • 217
  • 1
  • Gender: Male
  • Come on 32's
Home built drive shaft spacer
« on: August 11, 2007, 10:16:57 PM »
Well I aquired a chunk of aluminum and decided to try my hand at making a 3/4" drive shaft spacer.  The aluminum started out as a 1" thick by 6" wide by 19" long slab.  I was wondering how I would cut it down to size untill I saw my old Craftsman band saw. 


I did an excelent job and I ended up with about a 4-1/8" square. 


I then went to the lathe and made a mandrel to mount the block of aluminum on.  The rod is 3/4" diameter turned down to 3/8" and drilled and tapped for a 1/4" bolt. 


The block of aluminum is mounted up to mark the diameter of the circle.


« Last Edit: August 11, 2007, 10:19:32 PM by MKOLSEN22 »

*

Offline MKOLSEN22

  • 217
  • 1
  • Gender: Male
  • Come on 32's
Re: Home built drive shaft spacer
« Reply #1 on: August 11, 2007, 10:24:27 PM »
With the circle marked it was back to the band saw.


I used the band saw to knock the corners off of the square to save me time on the lathe.


Back to the lathe to true up the OD of the circle.


With the OD turned to the propper diameter I faced the one side of the spacer to make the centering nub to align the spacer in the pinion flange.


*

Offline MKOLSEN22

  • 217
  • 1
  • Gender: Male
  • Come on 32's
Re: Home built drive shaft spacer
« Reply #2 on: August 11, 2007, 10:32:27 PM »
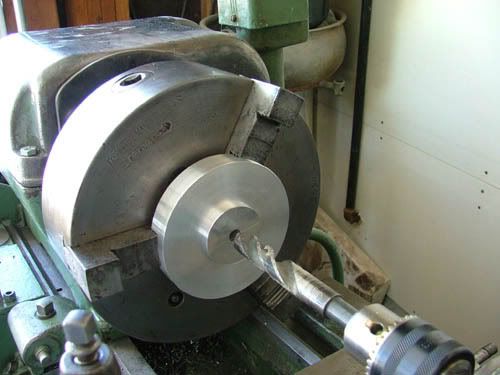
Time to switch from the mandrel to the three jaw chuck.  With the space held firm I started by drilling out the ID and then switching to the boring bar to get the final ID of the spacer.


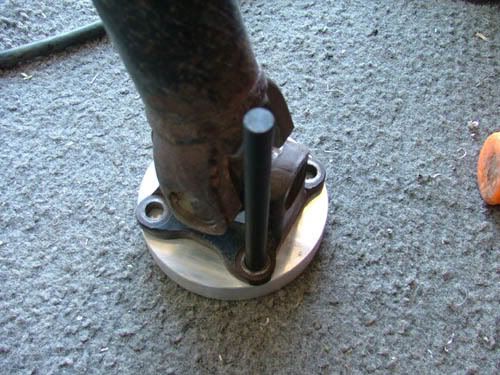
After all of the cutting was done on the lathe I used a transfer punch and the driveshaft to mark the bolt holes in their proper location.


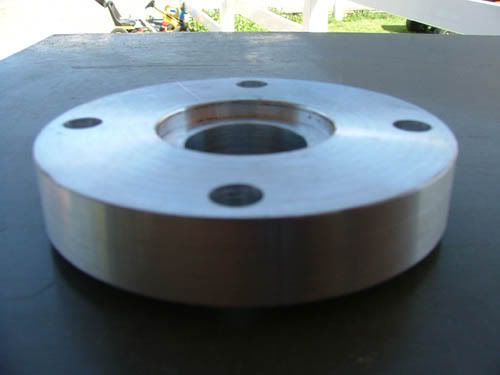
Here is the finished spacer showing the pinion flange side.


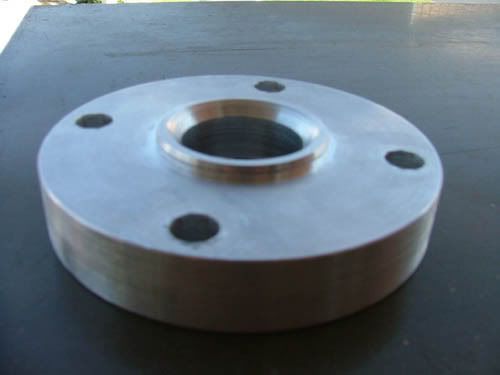
And the drive shaft side of the spacer.


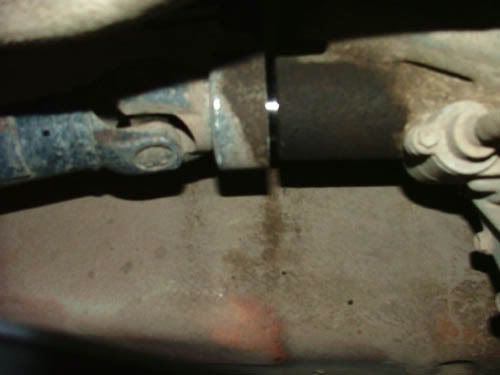
And her is the whole reason why I wanted a spacer.  Just my 1 1/2" coil spacer lift had pulled the drive shaft out of the t-case this much.  I though it would be better to have more spline engagement back.


*

Offline MKOLSEN22

  • 217
  • 1
  • Gender: Male
  • Come on 32's
Re: Home built drive shaft spacer
« Reply #3 on: August 11, 2007, 10:37:08 PM »
This is how the drive shaft / transfer case looked after the spacer was installed.


And finally the last picture of the spacer in its proper spot.  It was a lot of fun to make.  To bad I don't have access to a company to anodize it for me.  Well that's one more project done and in the books.


*

Offline Amilla

  • 1076
  • 0
  • Gender: Male
  • Toyota running gear was made for a samurai!
Re: Home built drive shaft spacer
« Reply #4 on: August 12, 2007, 10:37:49 AM »
very nice job, turning aluminum is one of my favorite things to do.
It just cuts so easy and smooth

well again, very nice job, looks very good.


Amilla
88 Samurai, Sprung Up, Geared Down, Locked,With Yotas.

*

Offline Rhinoman

  • 4502
  • 36
  • Gender: Male
  • Bend it, Break it, Fix it
    • Rhinoman
Re: Home built drive shaft spacer
« Reply #5 on: August 12, 2007, 11:41:23 AM »
Nice job  ;D
2000 Vitara 1.6, 3+3 Lift, 33"MTs, 5:83s, LWB brakes, Winch, Snorkel, Safari Rack
1986 SJ413K PickUp, 1.6L conversion.

OBD1 - Full diagnostics on a PC/Laptop: http://www.rhinopower.org

*

Offline MKOLSEN22

  • 217
  • 1
  • Gender: Male
  • Come on 32's
Re: Home built drive shaft spacer
« Reply #6 on: August 12, 2007, 11:58:47 AM »
Thanks guys!  This is what I consider to be my first real practical use of my lathe. 

I've turned up some other pieces such as coil spring spacers, threaded inserts for some tubing and some other misc. playing around but I liked this project the most so far.

I guess I'll have to get back to working on the body lift now.

*

Offline v-stone

  • 625
  • 2
Re: Home built drive shaft spacer
« Reply #7 on: August 12, 2007, 04:03:32 PM »
looks great. Inspiring me to get my Dads laythe working agian!
SAS Tracker! No looking back now.